Well, I’ve been slowly getting my quiver ready for this up coming ski season, cutting skins, mounting bindings and waxing skis (hey…nothing like an early start). And I’ve got to say, I’m very impressed with the new climbing skin tips from Black Diamond. Though they take a bit more time to install than the basic metal loop style, they are fully adjustable, allow the front of the climbing skin to sit flat on the ski at the tip and will hopefully also be more durable.
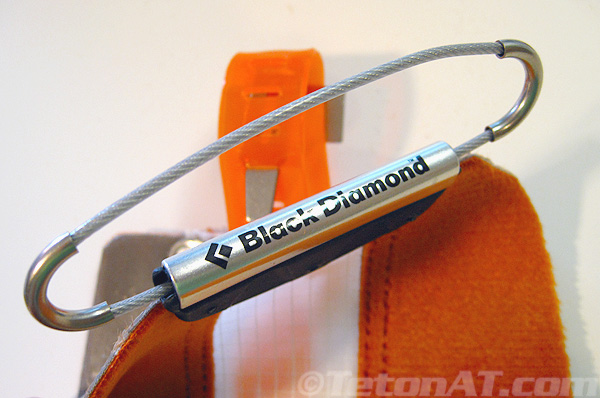
New Black Diamond Skin Tip Loops.
Installing the tips to the skins and adjusting them isn’t rocket science, but I figured I’d run through the process since I’ve already done a few of them. Before you install the tips though, you first you want to install the tail clips. HERE is a video I made last year that runs through the entire skin cutting process, before these tips were introduced. My rando-babble is good until about the 5 minute mark, then you can jump back here to install the tips…and then jump back to it at about 9:30 for tips on cutting skins to the width of your skis. To install the new BD adjustable tip loops, refer to the folllowing:
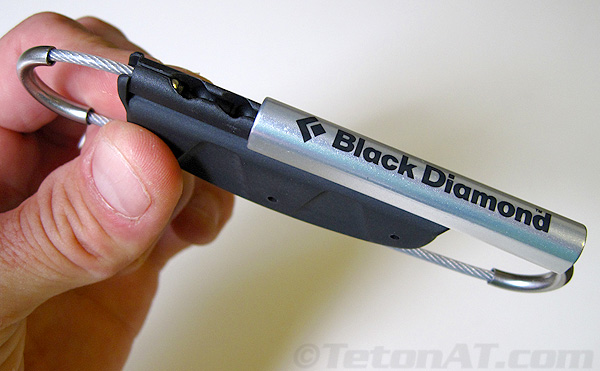
Slide off metal bar and adjust to ski tip.
 Slide the metal piece off the tip and position the wire ball in the appropriate position to allow for the tip loop to get good purchase on the tip of the ski, and then reinstall the metal bar. Feed the wire through the side protectors, so it is centered. Once the tip is installed to the skin, only one side of the loop will be adjustable. Note: It is important that the tip loops don’t sit too far down on the ski tip, where your skis can bang together and wear out the loops.
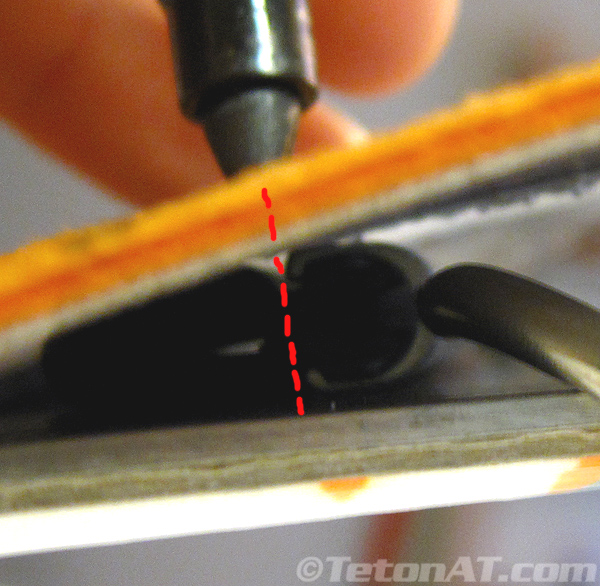
Mark the skin where it overlaps with the bottom of the metal bar.
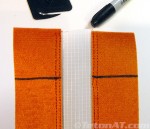 After attaching the tail hook and placing the skins on the ski, positioning the skin tip on the ski tip, grab a sharpie and mark where the skin comes in contact with the bottom of the metal piece on the tip-loop. You can kind of feel where this is through the skin, but it might take a quick look from the side to really see where this point is on the skin. Continue the line across the width of the skin, making sure it is level.
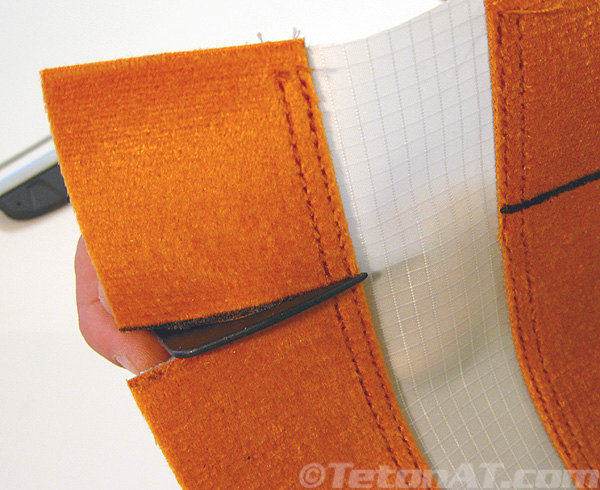
Cut off excess skin material.
Using the skin cutting tool provided, cut across the line. If you are using Split Skins, be careful as you transition from cutting skin material, to the nylon section that connects the two sides, as the cutting resistance between the two is substantially different and might cause you to make an uneven cut.
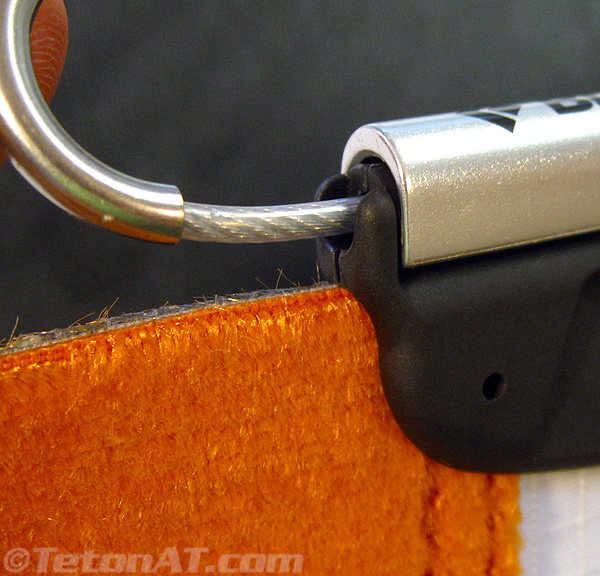
Make sure the skin tip is ALL the way on.
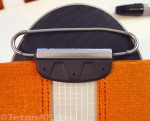 Once you have the skins cut to the right length, slide the plastic part of the skin tip onto the skin until it bottoms out. To do this, partially slide off the metal bar on the skin tip, put the tip onto the skin and then slide the metal bar back on. Make sure the skin tip is fully in place by looking at it from the side. Also make sure the counter-sunk holes on the skin tip are on the same side as the skin glue, and make sure it is centered on the skin.
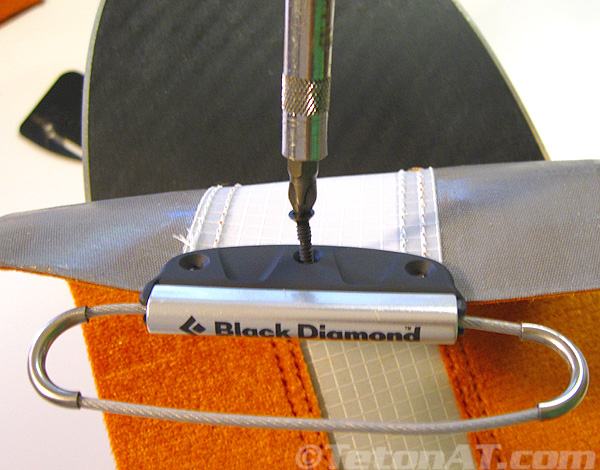
From the glues side, insert the three screws.
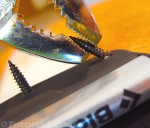 Next, insert the screws provided into the glue side of the hole and screw in place. Try not to over tighten the screws, as only about 5lbs of torque is need for proper installation. Once all the screws are installed, use a pair of pliers and break off the exposed part of the screw on the pelt side of the skin. The screws are designed to break at a particular spot, so just grab onto the screw with the pliers a bit up from the bottom and bend it back and forth until it breaks. Do this for all three screws.
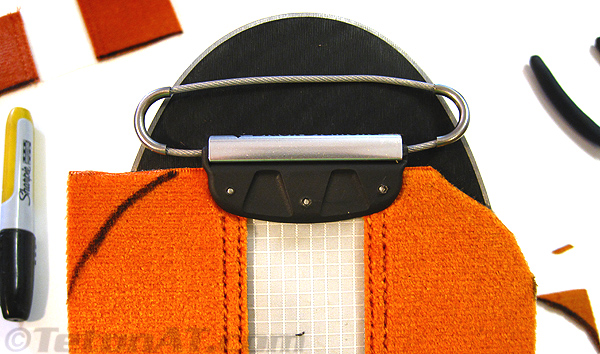
Round off the corners.
Round off the edges of the skin so as not to have any sharp corners that might want to lift off the ski and allow for snow to accumulate. If you’re not super confident in your free-hand cutting, mark the skin so you have something to follow.
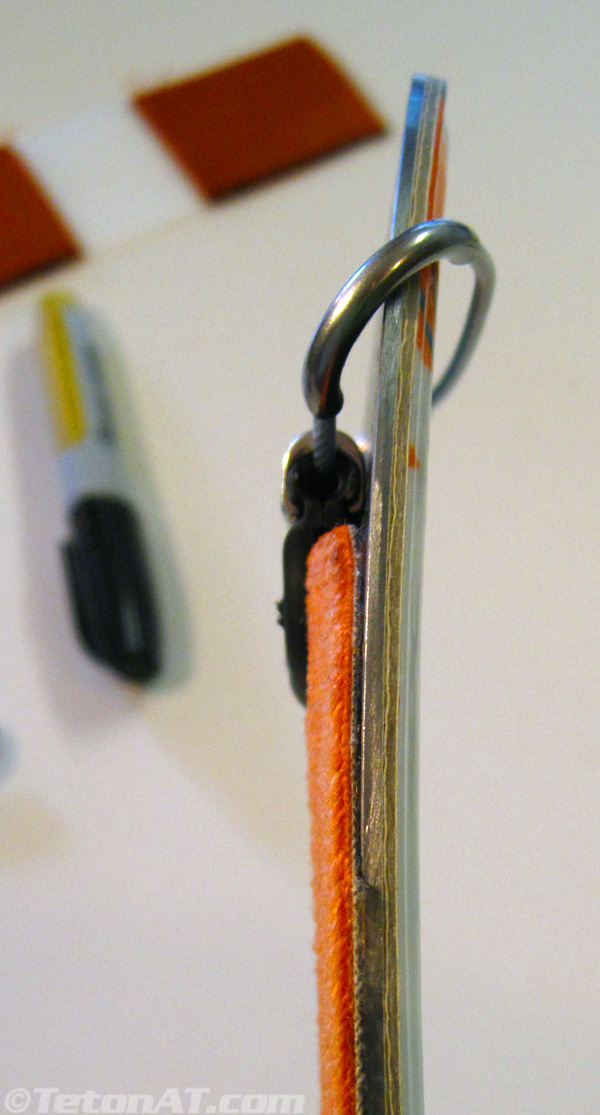
New BD skin tips allow for the front of the climbing skin to sit flat on the skins…
…reducing the possibility of snow packing under your skins.
Now, put the skin onto the ski as you would when you are going skiing. Tip first, centering the skin on the ski and them then snap on the tail clip. If the tension of the skin isn’t how you would like it, you can tighten or loosen it by moving the tail clip, or adjusting the width of the tip-loops. Just remember to keep the tip loops up on the tip and away from banging edges.
*The next step…pray for snow!*

Great post. Have you tried the G3 Alpinist Skins? They’ve been a godsend for me. The tip automatically adjusts to fit any ski without any customization at all. And they stay put. And they’re low-profile. Seems like a superior solution to me…
Thanks! I haven’t tried them…but I’ve sold them at the shop. It’s a cool design, but I’ve found they don’t fit on some skis that have a cap on the tip (like the Dyanfit Manaslu) because they are too thick to fit into the hooks on the skins. Which is too bad…because it would probably be a good combo.
Do you know if BD will be selling just this tip loop? I like the way it lays flat on the ski and would retrofit these onto my existing STS skins.
Good call. Looks like they are selling just the tips…$19.95. Two different models…one for regular skins…one for split skins.
http://www.blackdiamondequipment.com/en-us/shop/ski/skins/sortby/price/sortdir/desc/
oh man! “just the tip”…how can you resist that?
Hey Sierra Journal – Have you had any durability problems with the G3 tip piece? I’ve heard a couple reports of the rubber ripping. I’ve also heard some people say that the tip piece stays put so well that they have a hard time taking the skins off while still wearing your skis (you pull the skins off but the tip piece gets stuck). Too bad the G3 tail piece is annoying. I wonder if you could get one of the STS pieces into the G3 tails….
Looks like the fit well over the MegaWatts! Sick! A skin for the rounder tips. What do you think of the split skins? I have a buddy that raves about this idea before it was on the market…
I haven’t actually used the split skins yet…but I’ve talked to some people that have and they like them. They did mention something about changing technique a little…in firm conditions…focusing more on the edge as opposed to trying to get the skin/skin to sit flat on the snow. Makes sense I guess and I can’t wait to give them a spin.
I used the split skins all last season (about 80 touring days) and they are crucial!!! I had them on Megawatts as well and with all that surface area they gripped uphill excellently even on the flat hard stuff going straight up. When I first saw how pro Euro rando racers skin with minimal skin coverage on foam toothpicks, I realized that I was overskinned and to get away with less it was a matter of technique. I still like more surface area than they do but the split skins are a great compromise and the lightweight aspect is really dope. I personally don’t even use the tail attachment dealies.
Nice installation instructions Steve! However I found using thick scissors on the tip cuts is more effective and easier.
Right on Ptor! I agree using scissors works well with rounding out the corners of the tips, but they also tend to get all sticky with glue as well.
A thin layer of olive/cooking oil on the scissors or cutting tool???
I have a philosophical issue with these tip loops… is a design with seven parts, logos, three fasteners, a price tag of $20 and increased weight really better than a simple welded steel tip loop?
As far as the Manaslu, the reason it has a bulbous tip in the first place is so that you can use the tricked-out Dynafit skin system, which has the advantage of being a tip-ripper instead of a tail-grabber.
I see where you are coming from Andrew and we’ll see how durability is with them. But from a retail/customer stand point, it was always a pain in the but swapping out and exchanging different size tip loops. I’m sure BD ended up with alot of the small/med sized ones. As far as weight differences…bust out the scale! 🙂
Retail? Customer? Vaht ah des things?
Now instead of BD ending up with small/med sized loops, the customer ends up with less cash in their pocket. Problem solved. 🙂
no one said genius was cheap.
Genius? At this rate you are going to have enough Kool-Aid credits to get the free BD Propeller Beanie.
As far as weight goes, ya dasn’t hafta fold over the tip of the skin through the stupid rigid and actually heavier metal tip loop and then sew it so it doesn’t peel off all the time so…. there’s less skin and therefore less weight and more surface sticky area near the tip where snow builds up if you have a fat patch folded over. And the flexible loop is more versatile.
Anyways, if the grams are THAT important, then keep drinking diet coke and dispose of those pesky excess brain cells, drill holes in your bones and helium fill your teeth. Or go all they way like Messner and get rid of those annoying toes. Adjustable is great. Zero problems, no koolaid. Besides they’re free if you buy the skins. Why would you want to put them on inferior skins anyways. Like I said, 80 days and totally bomber and I’m not gentle on equipment. Where can you get propeller beanies??? I want one!!
If ya just gotta peel your skins off from the front of your foam toothpicks… well, to each his own.
Bon Jour Ptor – I cut my skin fold-over short and stitch it together with a Speedy Stitcher. It is 100% bomber, lightweight and very simple, as well as weighing less. No adjustment? No, but you don’t have any tip adjustment with the new BD tip either.
As far as saving grams, I think every gram counts, and before you know it, they add up and you have such a heavy set-up that it discourages touring and favors riding the wire and paying The Man. To each her own.
Adjustment is the whole point of the new BD tips Andrew. You can adjust the tip size AND the length of the skins via the tail clips. Of course we know the tail clips are overkill, but for that 2% they might come in handy, I think I’ll lug them around. Lay off the baby food…eh? 😆
I’m sort of with Andrew on this one. I use the climbinskinsdirect welded tip piece, fold the skins over by about 2 inches, speedy stitch and its done and bomber.
Meh…what’s the difference. The screws do the same thing as the stitch does. Do you use hemp twine?
I’m glad to avoid sewing anymore (which I always did) and to not have a folded over piece. Normally it’s easier to find a phillips screwdriver than a speedy-stitch. One size fits all ski tips is definately a better idea. The drawback with the new BD system is that you need new screws to make a transfer to other skins which is still easier than undoing and redoing a sewing job. I understand the reluctance to this kind of new product and it is redundant until you buy a new set of skins if what you already got works.
Well, Andrew, actually people are getting stronger and stronger, for example choosing to ride big fat skis (actually designed for wild snow and not modified wire riding skis) in randonee mode, accepting a bit of weight for the benefit of downhill pleasure. The pleasure of skiing is what is attracting people away from the lifts! Grams have nothing to do with the choice of returning to lift skiing or not. Those that finally break trail in deep powder with really fat rockered skis will have a way easier time than on lighter foam toothpicks. Regardless, those that want to tour will be out there with their 212 super G skis, race boots and bindings and Sandro-steps like they always were, just like people tour amazing distances with their Marker Dukes.
Of course I agree the lighter the better to a certain extent but after that it depends on one’s attitude. What’s the hurry? If one ends up as just a gram counting geek, they’ll be way out in front looking at their heartrate monitor with no friends. If one is racing, above 6000m or is only traversing for 72 hours straight, OK whatever, but it’s hillarious to see the gram geeks out there with big bellies and that have nothing to do with speed that flounder all the way down. It’s all relative. Better to just increase the “nano-gram” level in the bloodstream when changing over modes, chill out to enjoy where one is and remember why most people are out there, which normally is to ski down, not extremify cross-country skiing and that should be an important distinction in the backcountry skiing marketplace. Randonee racing equipment should not be confused with performance or pleasure oriented backcountry skiing. To me it’s been all the lightweight crap that’s been foddering the euro-geek market, retarding the progress of making performance ski-touring gear (with the exception of Dynafit bindings). Just like racing skis have confused off piste-lovers for decades. Shredding hard in the backcountry in tour mode, has never, untill recently, been the focus driving product design, mostly still only an afterthought to appease the fringe.
Besides, if we keep going lighter with all this carbon fiber stuff, we’ll be paying “The Man” his girly-man carbon-tax anyways!! Ha, ha.
And I still want a propeller beanie!!!
Well put Ptor. There is a time a place for gram counting…and propeller beanies are SO hip right now anyway.
I’m talking about tip to tail length/tension adjustment, not side to side on the tip. The cable/loop style tip loop came into being when lots of skis were being manufactured by blowing or vacuming foam into them via the tip. To cover the holes in the tip, lots of skis had little knobs or caps on them, which meant the old style welded steel tip loops wouldn’t fit. Hardly any skis are built that way anymore, but the swaged cable tip loop lives on. Personally, I’m not a big fan of the cables are they are kind of a sloppy fit and the coating gets all tattered in no time.
Ptor – between your disdain for manual labor (sewing), disregard for expense and new found love of weight/pork, you are beginning to sounds like…. an American. And possibly even a Republican one at that.
🙂 (just kidding my friend, just kidding)
Now THAT’s funny!!! But I thought both Republicans AND Democrats like to delegate labour to Chinese, spend trillions on nothing and love to throw their weight around the world. How can you tell the differnece between them??? If I was American, I sure would be Independant!!!
But seriously, where are the electronic skins built right into the bases I heard about a few years ago??
Democrats backcountry ski…Republicans heli ski.
Well now, I wish you would’ve just compared me to Hitler. It would’ve hurt a bit less.
Enlightened Organic Tribalist Monarchists will take a heli once in a while and still skin tons. Polarization politically (as in getting sucked into the illusory two party system (3 in Canada)) or in the backcountry (as in anal (and hypocritical if one uses a car) purism or cronic slothfull motorized instant gratification (abuse of affleunce)) will only limit us and keep us separated and weak. Thank you Ascension/Pomoca/Colltex etc. and thank you Aerospaciale/Bell/Augusta/Twin Otter/Palatis Porter etc.!!!
@JW – No haven’t had any durability issues thus far with the G3 Alpinist, but I’ve only used them for one season so we’ll see. And yeah the tip loop stays put really well – maybe too well for some people’s taste. If you’re the type who rips the skins off with your skis still on your feet, that might be annoying. But the trade off in security while skinning is worth it to me. And I actually really like the stock tailpiece.
The biggest bummer to me about the BD tip loops has always been that the wire eventually gets frayed (maybe they’ve fixed that prob since, not sure) and you end up bleeding. But I’m a G3 convert for sure…
enough BS…
Just bought and installed the tips and I am very satisfied with the weight and bulk savings!
The BD tip loops weight is 1.4oz for both; the weight savings realized was 1.2oz – the old metal tips and the skin flap material which I cut off weight was 2.6oz.
The bulk reduction was very noticeable, but hard to quantify – roll-up smaller to fit in your pack or jacket pocket. I really like the way the skin sits flat – should avoid snow build-up.
Yes I could have cut and sewn the flap as suggested and the weight savings would have probably been a wash.
For me it was worth the $20 bucks!!!